SynergyCP WHMCS Integration
Setup
- Download and extract the WHMCS integration here
- Copy the entire directory via FTP, SCP, etc. to
/<WHMCS_PATH>/modules/servers/synergycp/ - Go to SynergyCP Admin > System > Integrations.
- Add an Integration for WHMCS.
- Edit the Integration and make sure it has the following permissions:
- Clients (View & Edit)
- Installs (View & Edit)
- Servers In Use (View & Edit)
- Servers In Inventory (View & Edit)
- IP Entities (View)
- IP Groups (View)
- Create an API Key for the Integration, and copy the key.
- Go to WHMCS Admin > Setup (Top nav) > Products/Services > Servers
- Add New Server
- Name: SynergyCP
- Hostname: The hostname of the SynergyCP API - this should start with
api.
- Scroll down to Server Details:
- Type: Synergy Control Panel
- Access Hash: <API Key of SynergyCP Integration>
Adding a New Product
- Go to Setup (Top nav) > Products/Services > Products/Services > Create a New Product
- Product Type: Dedicated/VPS Server
- Product Name: The CPU name (e.g. E3-1270v6, Dual E5-2620v4)
- Module Settings:
- Module Name: Synergy Control Panel
- CPU Billing ID: Whatever the CPU Billing ID is on SynergyCP
- API User: The username of any WHMCS admin that has API access enabled.
- PXE/IPMI/Switch Access: Select which permissions you wish to grant to each client on any automated provisions.
- Termination Action: What to do when a client’s server is terminated due to billing issues. Note that this is overridden to create ticket for VIP clients no matter what.
- Pre-OS Install: We recommend format-quick as the Pre-OS install. Formats are required before some OS reloads to get rid of the old disk partition table.
Configurable Options
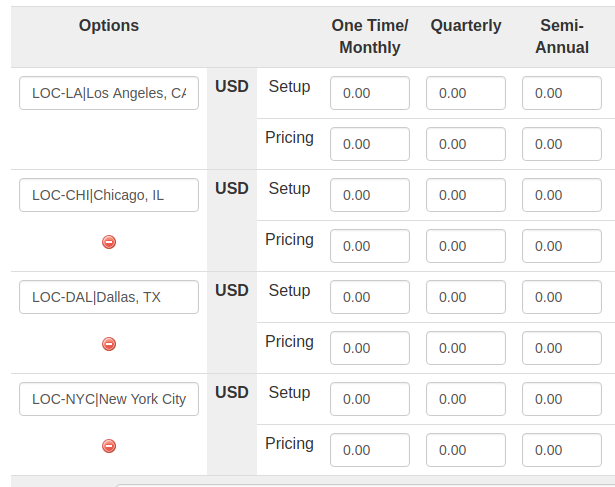
Configurable Options use the billing ID on WHMCS to link up with the billing ID on SynergyCP.
The billing ID is specified before the value shown to the user separated by a Unix pipe character:
Every SynergyCP product on WHMCS must include the following Configurable Options (names must match exactly):
| WHMCS Configurable Field Name | Example Field Value | Special Notes |
|---|---|---|
| Memory | 8GB|8GB RAM | |
| Datacenter Location | LOC-LA1,LOC-LA2|Los Angeles | This must correspond to an IP Group in SynergyCP. Accepts comma-separated billing IDs. |
| Network Port Speed | speed-1000|Gigabit Uplink | |
| IPv4 Addresses | IP-29|/29 Block (5 Usable IP Addresses) | |
| Add On 1, Add On 2, etc. (any number of entries) | HW-RAID|Hardware RAID Controller | Use ADD- RAID1 and ADD-RAID0 as billing IDs for automatic software RAID configuration. |
| Drive Bay 1, Drive Bay 2, etc. (any number of entries) | 1TB-HDD|1 TB Hard Drive | The billing ID value should be None for empty disk bays. |
| Operating System | os-centos6|CentOS 6 | The billing ID must match an OS Reload Profile's Billing ID on SynergyCP |
| Bandwidth | 20000GB|20 TB Bandwidth or |Unmetered Bandwidth | Optional. The billing ID MUST use the same unit as your overage billing setting in WHMCS (default is GB) |
Preset Configurable Options
Under Products/Services > Module Settings there are the Memory Billing ID, Addon Billing IDs, and Disk Billing IDs fields. These can be set as default preset values for these fields. If the corresponding Configurable Option field is included it will override its respective field. These options can be used for setups with complete or partial pre-configuration of servers. The fields use a comma-separated format that allows for multiple values: add-1, add-2|Addon1, Addon2